Software 101: Adding Vignette
If there is one effect that I would have to name the most popular for photo editing it would have to be the vignette.
Everyone tries it out sometime and usually with good results. Its a subtle effect that can draw attention to the center of your image and create nice framing. Today I'll show you how to apply a vignette with a few different editing programs, and talk a little about what not to do with vignettes.
Using vignettes is very easy in most programs, often requiring only a couple clicks.
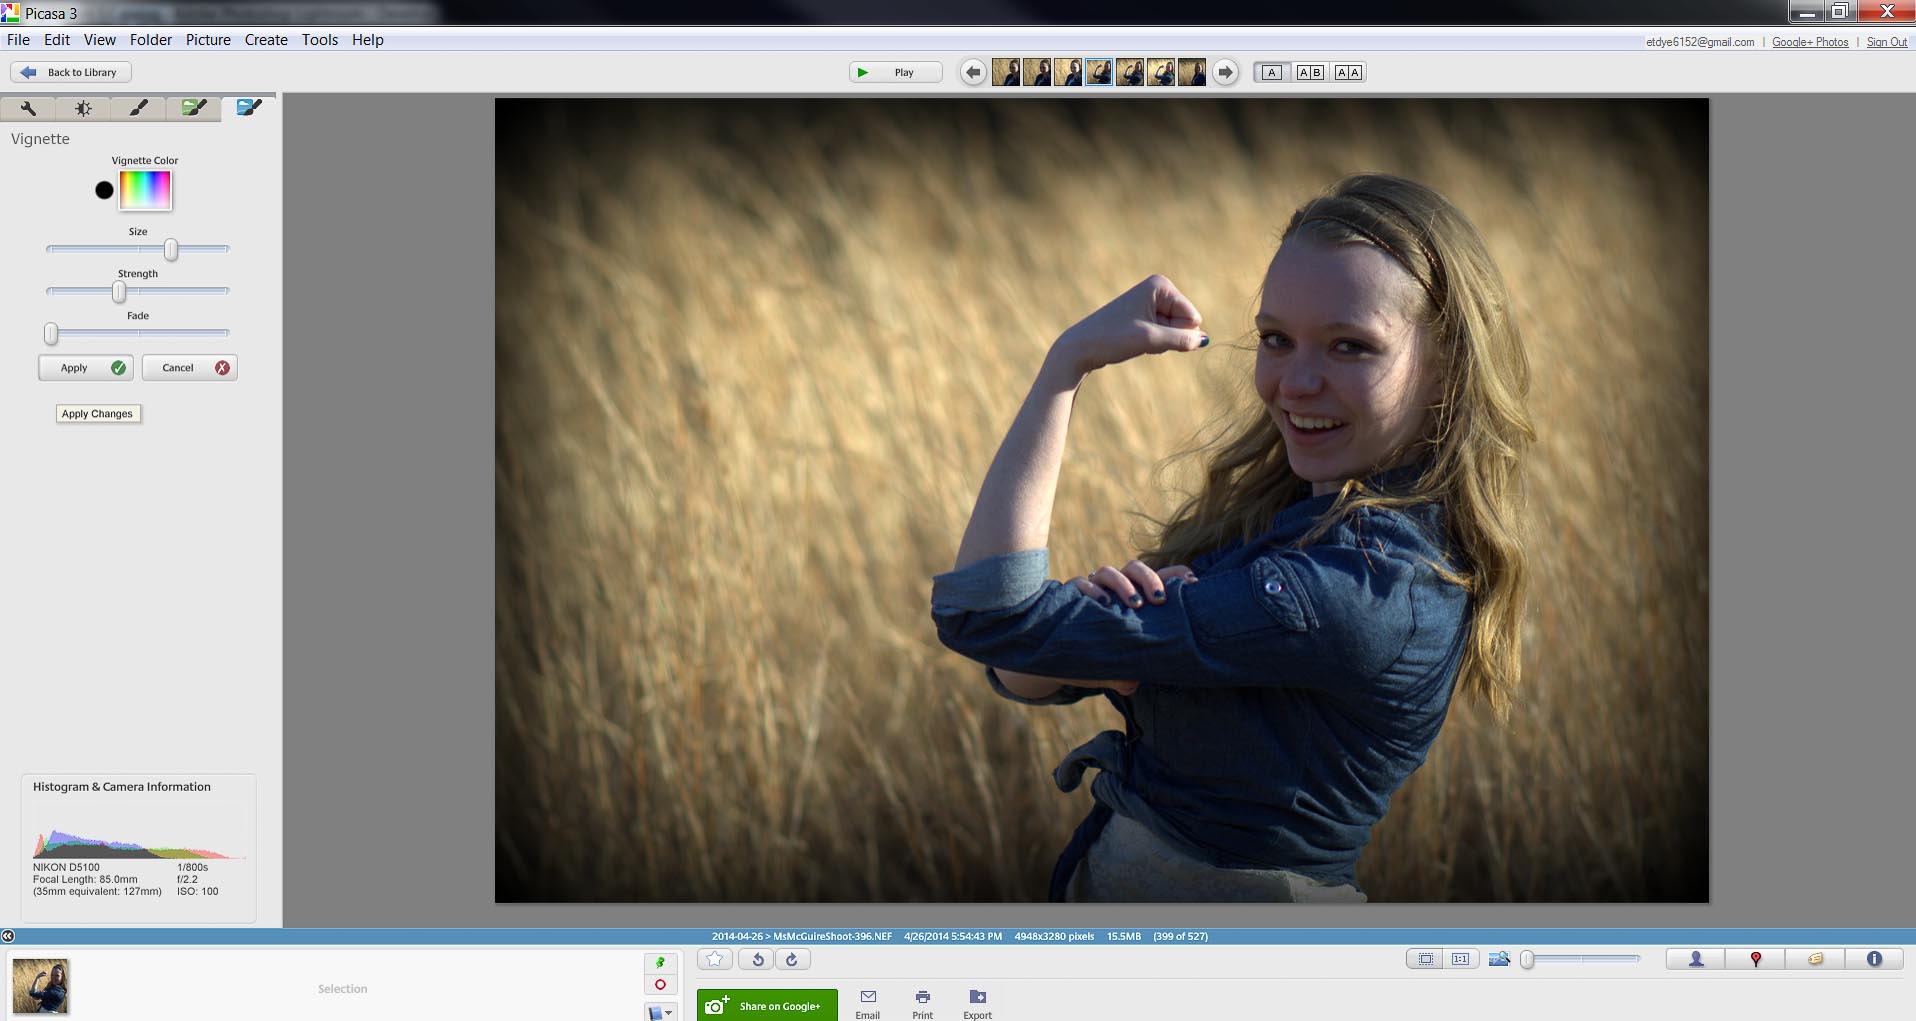
Applying a Vignette: Google Picasa
- Select your photo
- Go to the last editing tab
- Click Vignette
- Drag sliders to taste
- Click Apply


Picasa even allows you to change the color of your vignette, but I have yet to find a situation where that ever looked good. Stick to black.
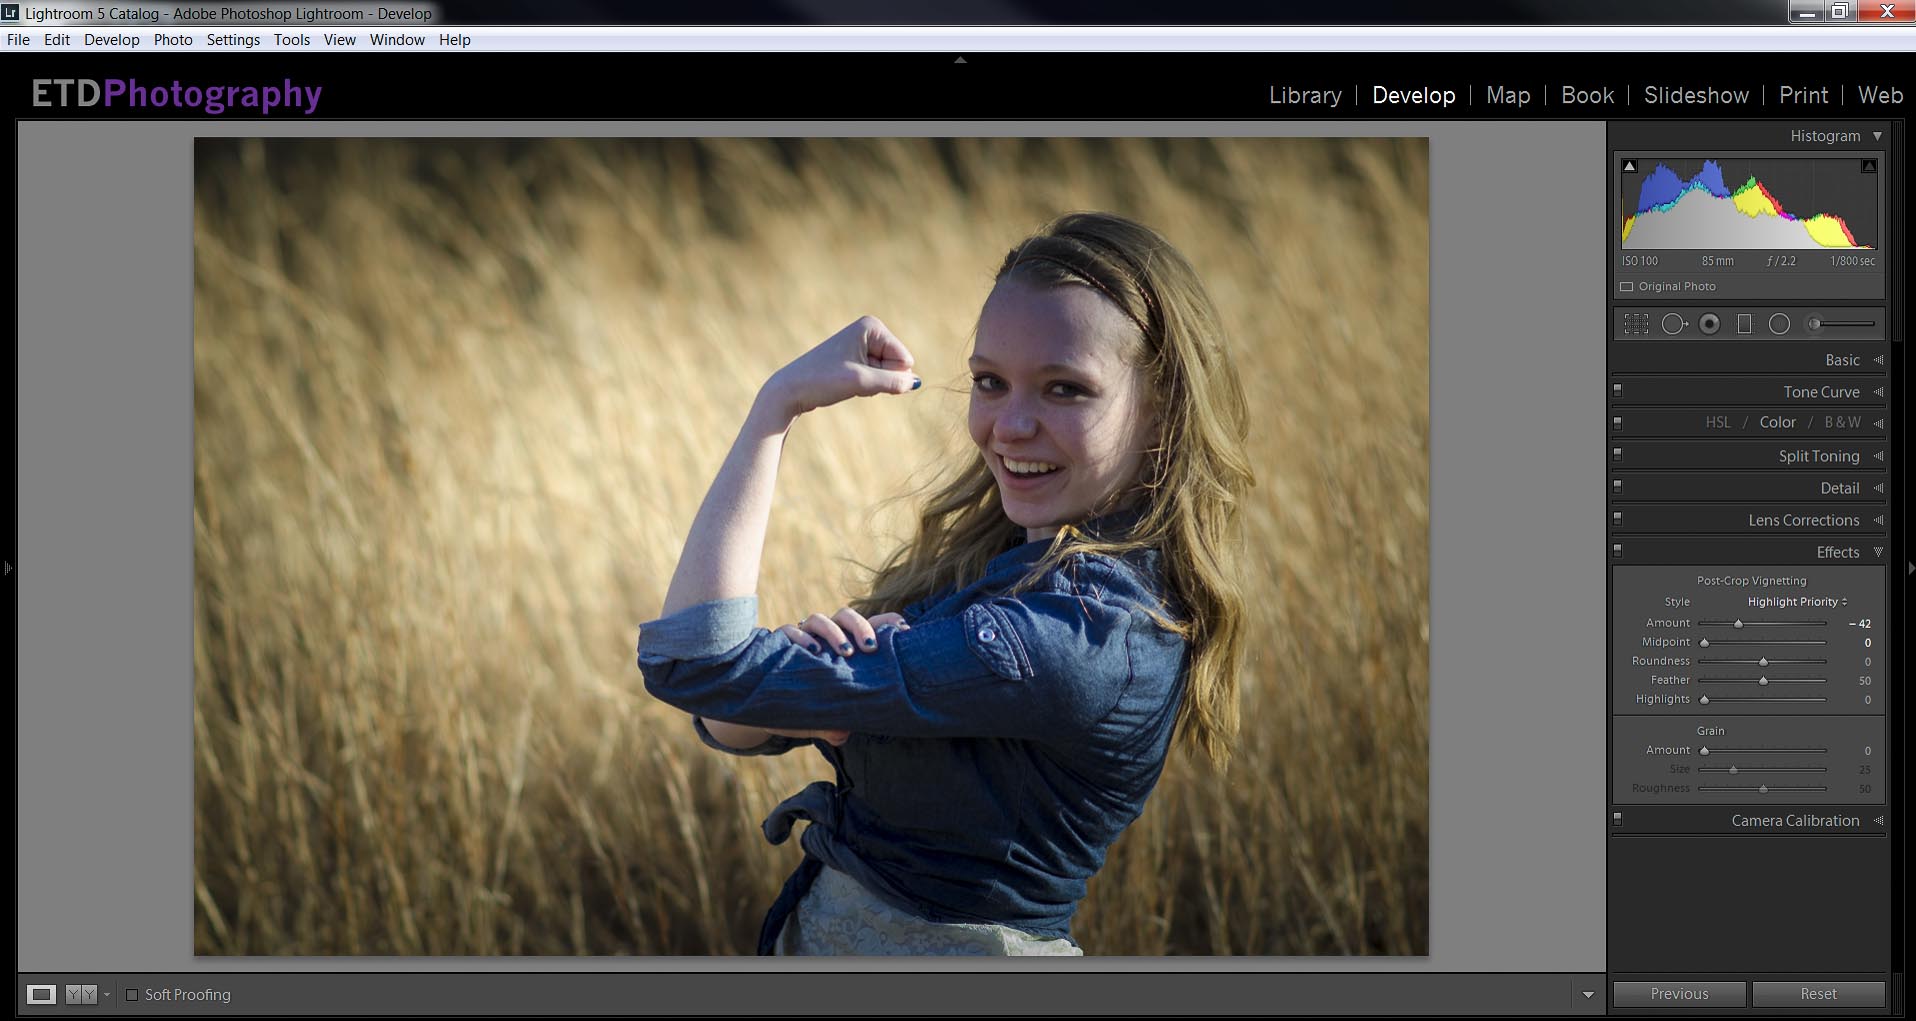
Applying a Vignette: Adobe Lightroom
- Select your photo in the develop module
- Open the Effects tab
- Adjust sliders to taste


Lightroom provides a lot of control over the look of your vignette. Play around with the sliders until you find a look you like. Effects like these have no recipe for greatness. Have fun and explore your options.
Applying a Vignette: Adobe Photoshop
Like anything you do in Photoshop, there is a million ways to make a vignette. Here's one I like that lets you 'paint' the vignette in.
- Open your photo in Photoshop
- Go to adjustments and apply a curves adjustment layer
- Grab the middle of the curve and pull it to the bottom right a bit (the whole image should get darker)
- Take the bottom left point and drag it to the right a little along the edge.
- Select your layer mask, switch color to black, and hit ctrl+i (mac command+i) to make your layer mask black. Your image should look normal again.
- Press 'B' to bring up the brush tool. Select a soft large brush with a flow around 35%. Paint with white around the edges where you want your vignette. If the effect is too strong, lower the adjustment layers opacity.


What NOT to do with Vignettes
While vignettes are a generally forgiving effect, here are some things you want to avoid.
- White vignettes - Lightroom will let you do this. Don't.
- White vignettes are actually meant to take natural vignette out of photos when they aren't wanted. They never look good on regular photos.
- Sharp vignettes - In my Lightroom gallery you see a couple examples that basically makes a black circle around your photo. This is just to demonstrate what the sliders do, I would not recommend actually leaving your photo like that.
- Extremely strong vignettes - If more than 40% of your photo is shrouded in vignette darkness, you've gone way too far. You should still see detail to the edges of your photos with vignetting applied.
- Vignette ALL THE THINGS! - Vignetting looks good, but its an effect that can get boring if you put it on everything in a shoot. It will become easier to notice too, and you want people looking at your subject, not the editing.
Avoid these things and just about any vignette you decide on will look pleasant. Experiment and have fun!
